How to Deploy your Node.js Application?

As a passionate Software Developer, I thrive on crafting dynamic and user-centric applications. With a strong foundation in full-stack development, I'm dedicated to delivering top-notch experiences through robust code and innovative solutions.
Introduction
So far we have created a NodeJs REST API that scrapes and return pinned repos from the user's GitHub Profile. We also added some new features like scraping social preview of each pinned repo, filtering only pinned repos' Github API data and giving users a very basic UI to get started with.
Now, it works fine on our local system but we need to deploy and host it on a server to consume it. So, today we will learn 3 ways to deploy our NodeJs app.
Deploying to Heroku
Deploying to Heroku using GitHub Actions
Deploying to AWS
Pushing our code to GitHub
Before we start deploying to these hosting platforms, we need to push our code to GitHub. Follow these steps:
Creating a New Repository
Open https://github.com and log in to your account.
Click on New Repository
Now in the form fill Repository name and select either Public or Private. Skip Description and Initialize this repository with section and click Create Repository.
Creating .gitignore file
Coming back to our terminal, make sure you are at the root folder of your project.
Now, create a .gitignore file by running
echo "" >.gitignore # in Windows
OR
touch .gitignore # in Linux or Mac
and populate it with this code.
Pushing our code to GitHub
Download git from https://git-scm.com/ if you haven't.
Now, run
git initto initialise git in your directory.Then, run
git add .to add all the files to the staging area except the ones mentioned in the .gitignore file.Now, we will make our first commit using:
git commit -m "<Your Commit Message>".
💡 Commit Messages should always be descriptive like: [INITIAL] complete local version. Check the last section for more.
- And finally, push our commit(s) to our remote repository in GitHub by running:
git push -u origin main.
Voila!! Your code is now available on GitHub. 🎉
Deploying to Heroku
Heroku is a Platform as a Service (PaaS) that is hosted on AWS. It takes care of all the Infrastructure configurations like launching new servers during high traffic, etc. letting you focus on your app rather than worrying about scalabily and other related issues.
Now, we will deploy our app to Heroku.
Create Heroku app
Click New > Create new app.
Enter your App name and click Create app.
What is CI/CD?
In Software Development we try to automate manual tasks as much as possible. There are many platforms like Jenkins, CircleCI, GitHub Actions, etc. that are generally used for automating workflows. CI/CD is the process of automating the steps from testing the pushed code to deploying the final build of the application.
Continuous Integration (CI) involves building and testing the code merged in the main branch against predefined tests.
Continuous Delivery (CD) involves deploying the code to a testing server that is supposed to be a replica of the production server. After code at this stage is approved manually then only it is deployed to the production server.
Continuous Development (CD) involves deploying the code directly to the production server once it passes all the tests.
You can learn more about CI/CD here.
Heroku's in-built CI/CD
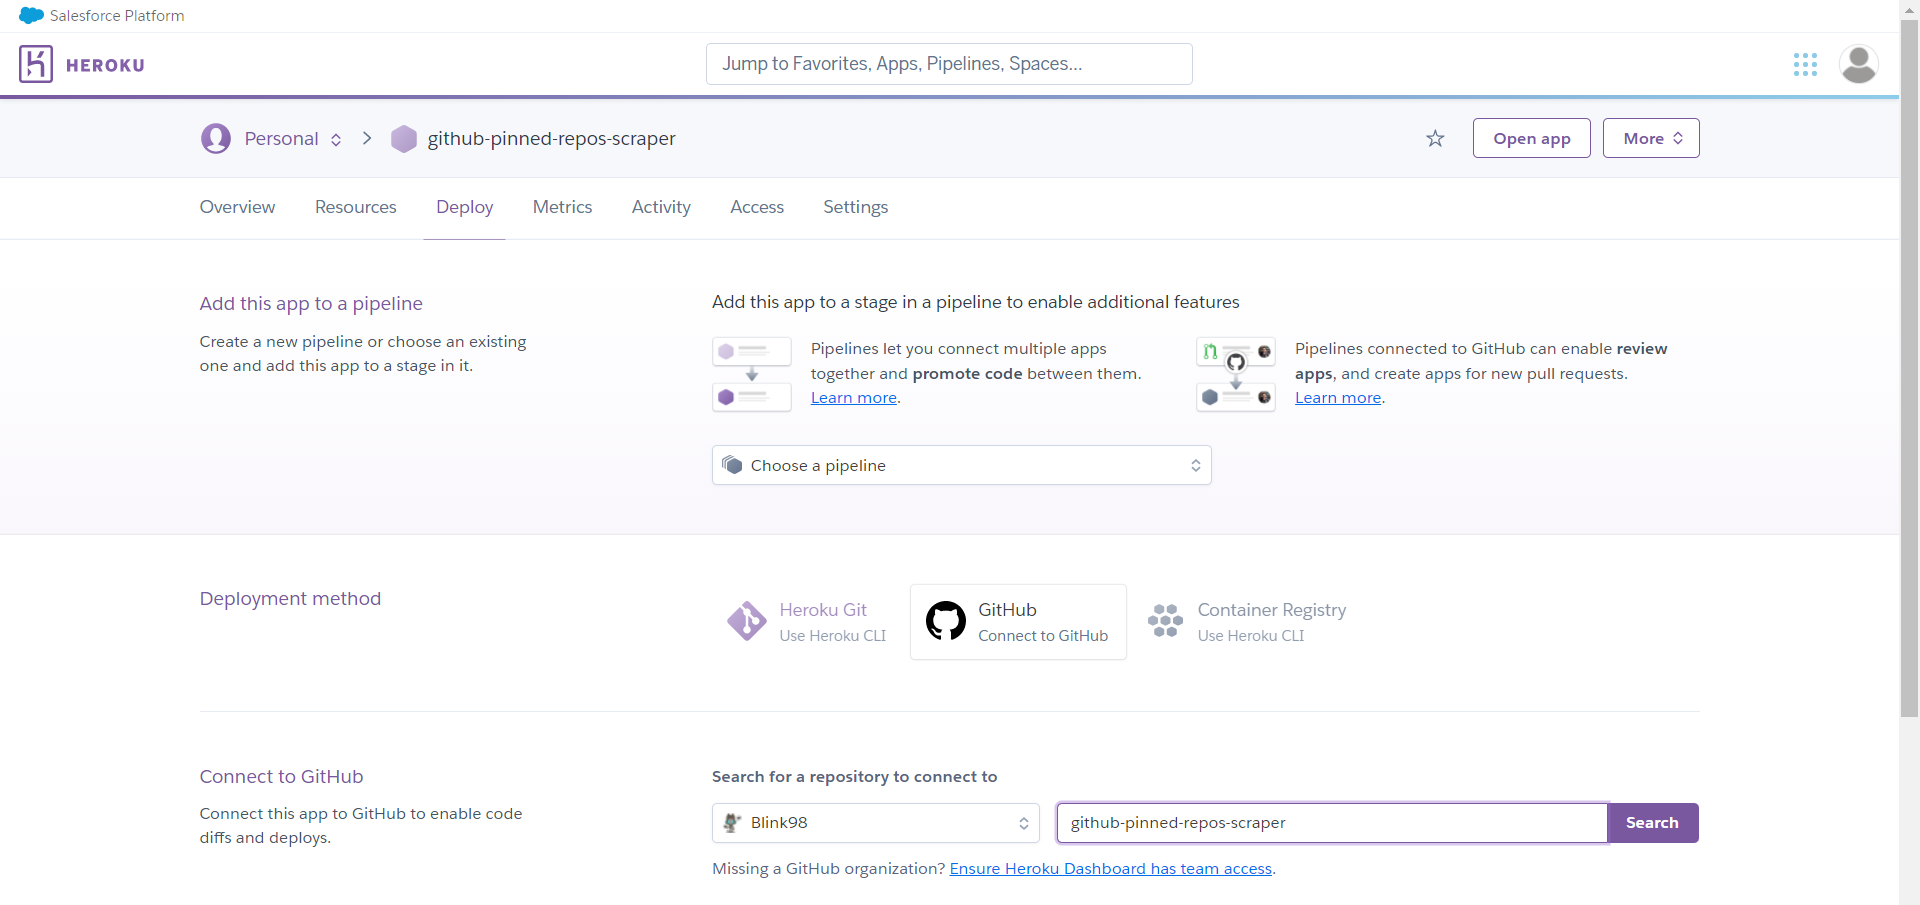
In your Heroku app open the Deploy tab and select GitHub as your Deployment method.
Now, Connect to GitHub and then, search and select your GitHub Repo.
- After connecting your repo select Enable Automatic Deploys under Automatic deploys section and select Deploy Branch under Manual deploy section (make sure that master or main branch is selected from the dropdown menu).
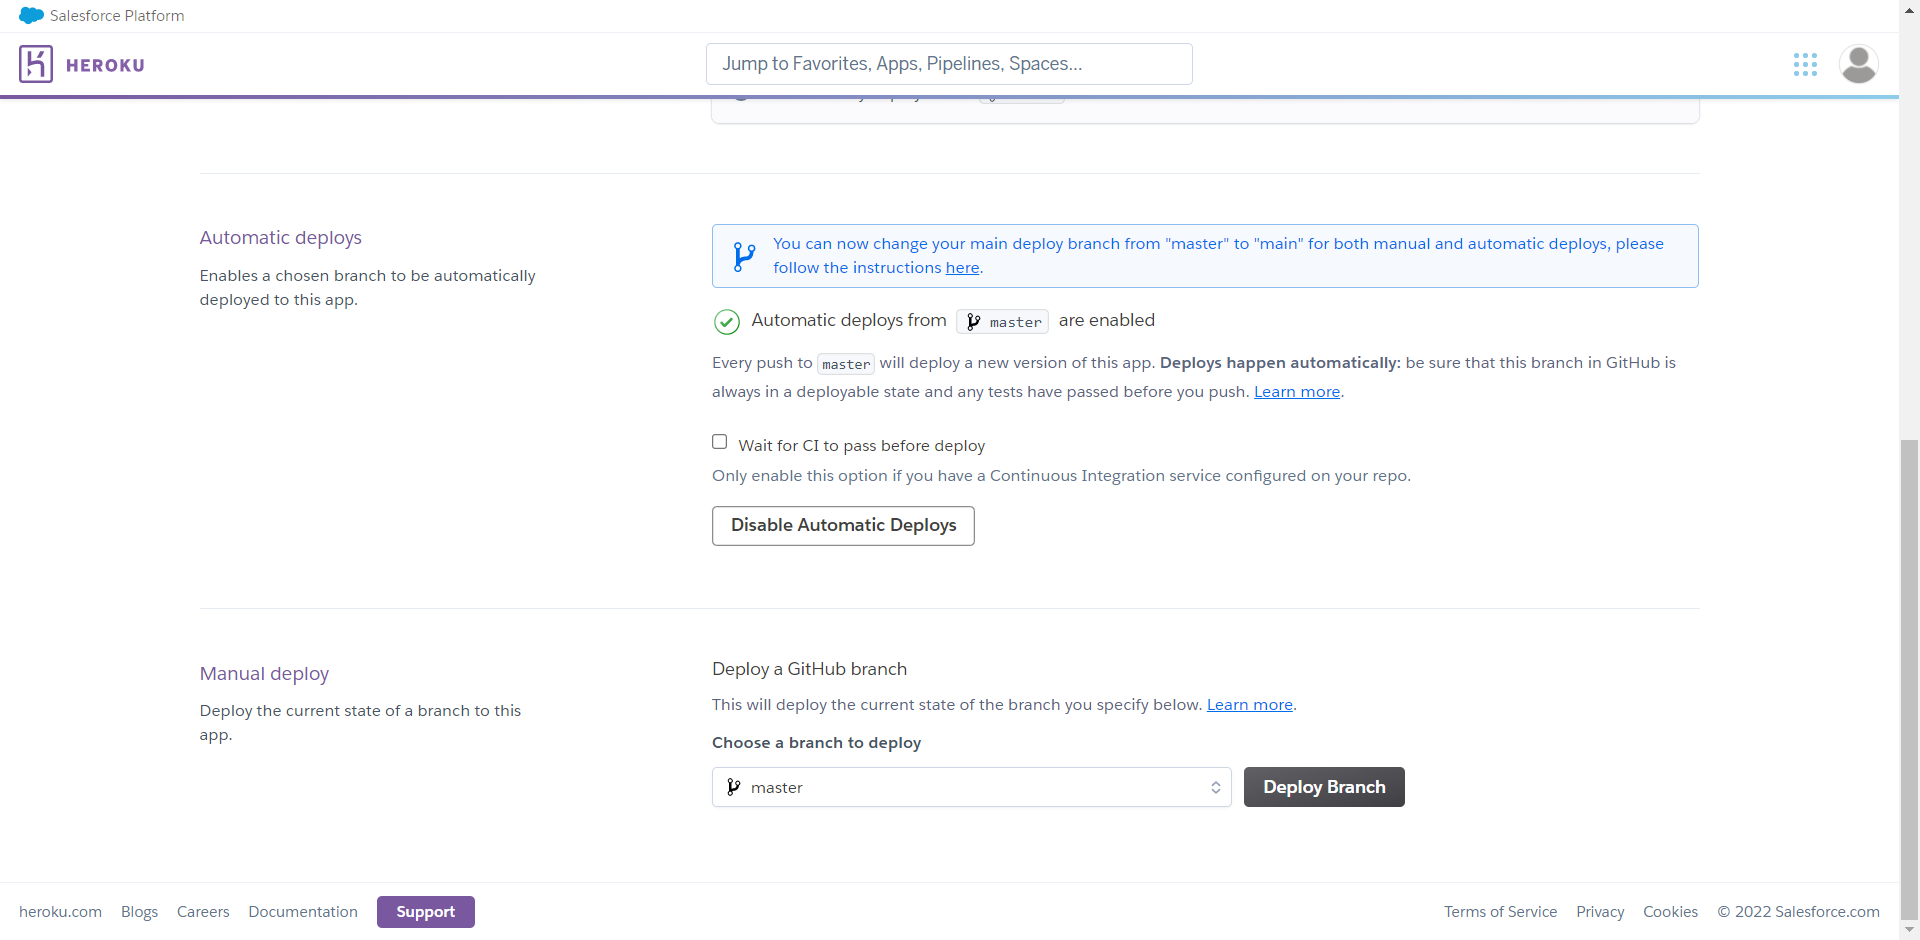
You have deployed your app once manually and from now on, whenever you push a new change into your master or main branch, Heroku will deploy it automatically.
Under the Activity tab, once Heroku creates the build successfully and deploys it, you can use Open app to check out your live app.
Use GitHub Actions to deploy the app to Heroku
GitHub Actions is a platform that allows you to integrate CI/CD into your project.
Create main.yml
mkdir .github
mkdir .github/workflows
touch .github/workflows/main.yml
Create a YAML file
Now, populate your main.yml file with the following code:
name: Main
on:
  push:
    branches: [main]
  workflow_dispatch:
jobs:
  build:
    runs-on: ubuntu-latest

    steps:
      - uses: actions/checkout@v2
      - name: Use Node.js
        uses: actions/setup-node@v2
        with:
          node-version: "14.x"
      - name: Install dependencies
        run: npm install

  deploy:
    runs-on: ubuntu-latest
    needs: [build]
    steps:
      - uses: actions/checkout@v2
      - uses: akhileshns/heroku-deploy@v3.12.12
        with:
          heroku_api_key: ${{secrets.HEROKU_API_KEY}}
          heroku_app_name: ${{secrets.HEROKU_APP_NAME}}
          heroku_email: ${{secrets.HEROKU_EMAIL}}
What is going on here?
name:is an optional keyword if used at the beginning then, make its value the name of the workflow otherwise the value represents the name of the next steps. It will look like this on GitHub Actions' dashboard:on:specifies on which event should GitHub trigger the workflow.push:specifies on event push, GitHub should trigger the workflow.branches: [main]means on push to the main branch.workflow_dispatch:gives you the ability to manually run the workflow from the GitHub Actions dashboard.jobs:everything inside this is a job that will be executed. A job can be executed sequentially or parallelly (by default).build:is a job that will be executed on its virtual machine runner.runs-on:specifies which virtual machine runner to be used to run (or execute) the job. You can get more details and a list of virtual machine runners here.All jobs are made up of
steps:that are to be executed.Rather than reinventing the wheel we should be focusing on our GitHub Action's main logic so, GitHub Actions provides us with a keyword
uses:to use already defined GitHub Actions likecheckoutin our case.Now, the
checkoutAction itself checks out in our repository so, that GitHub can run the rest of our GA logic seamlessly. You can read in detail here.setup-nodeas the name suggests, helps GitHub in setting up a node environment for our app.with: node-version:is also a part of this Action that specifies the version of NodeJs GitHub has to install.run:specifies the command that GitHub has to execute.Similarly, in
deploywe specify ubuntu as our virtual machine runner.Then, we use
needs: [build]to wait for the jobbuildto be successfully completed first and then only move on to the next steps.Here also, we use
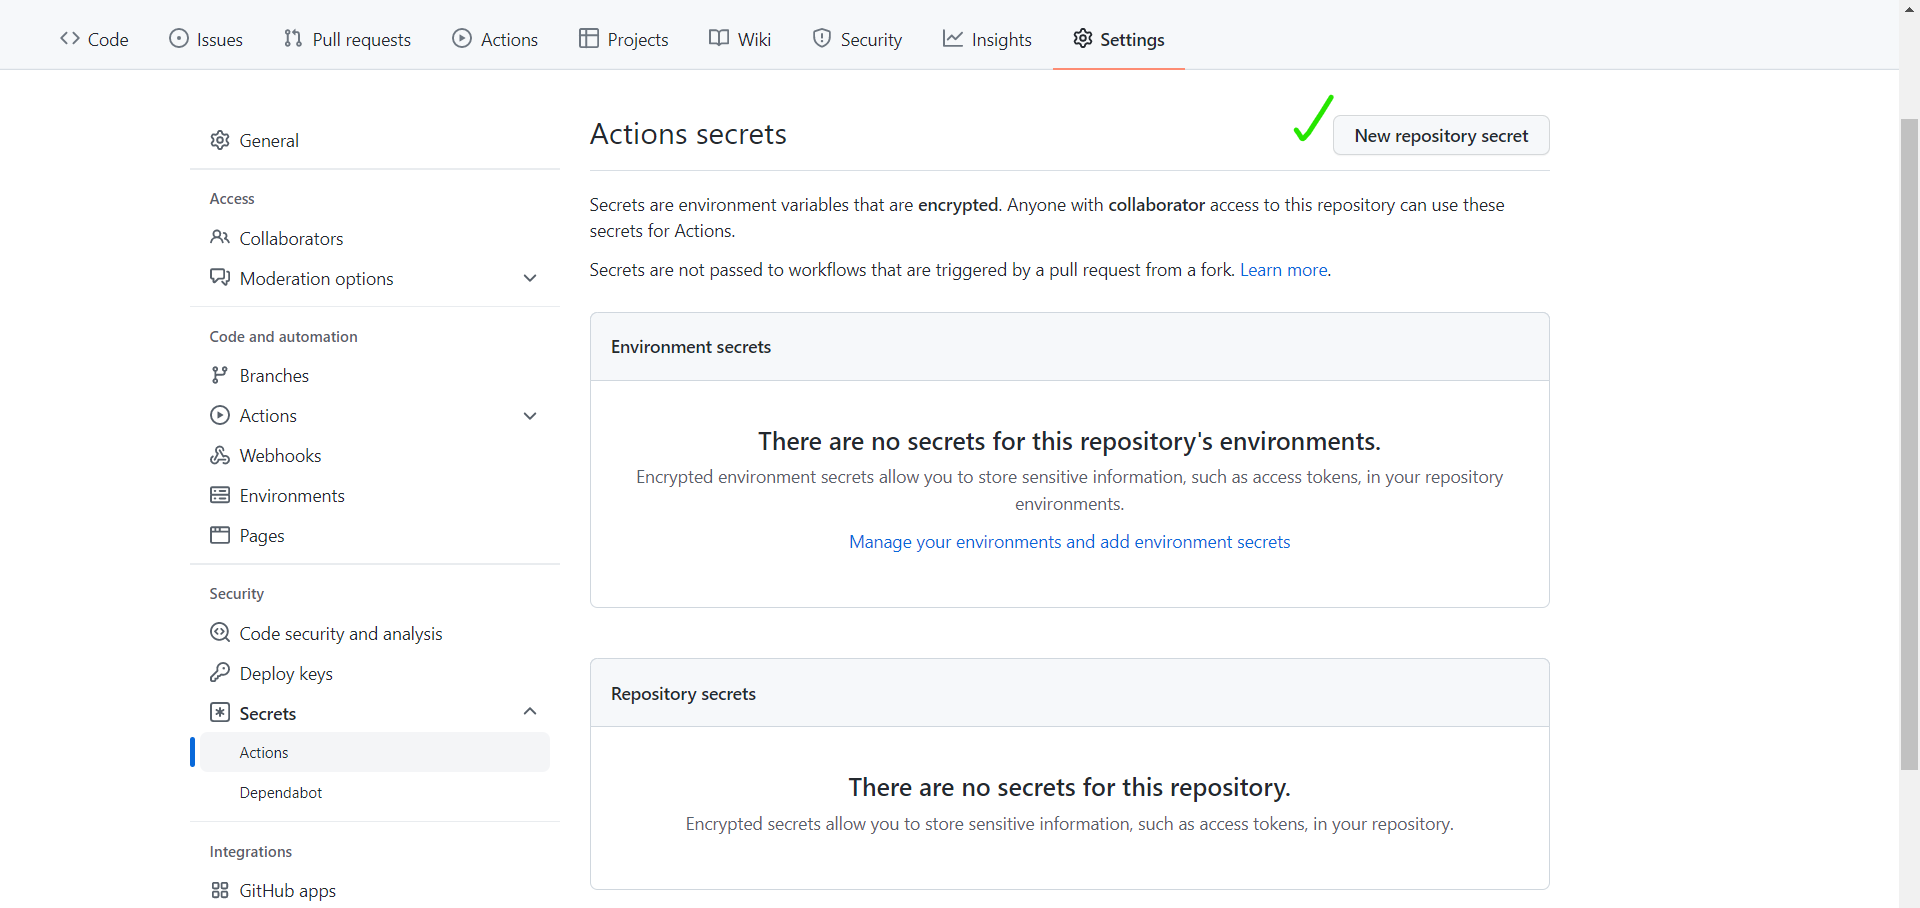
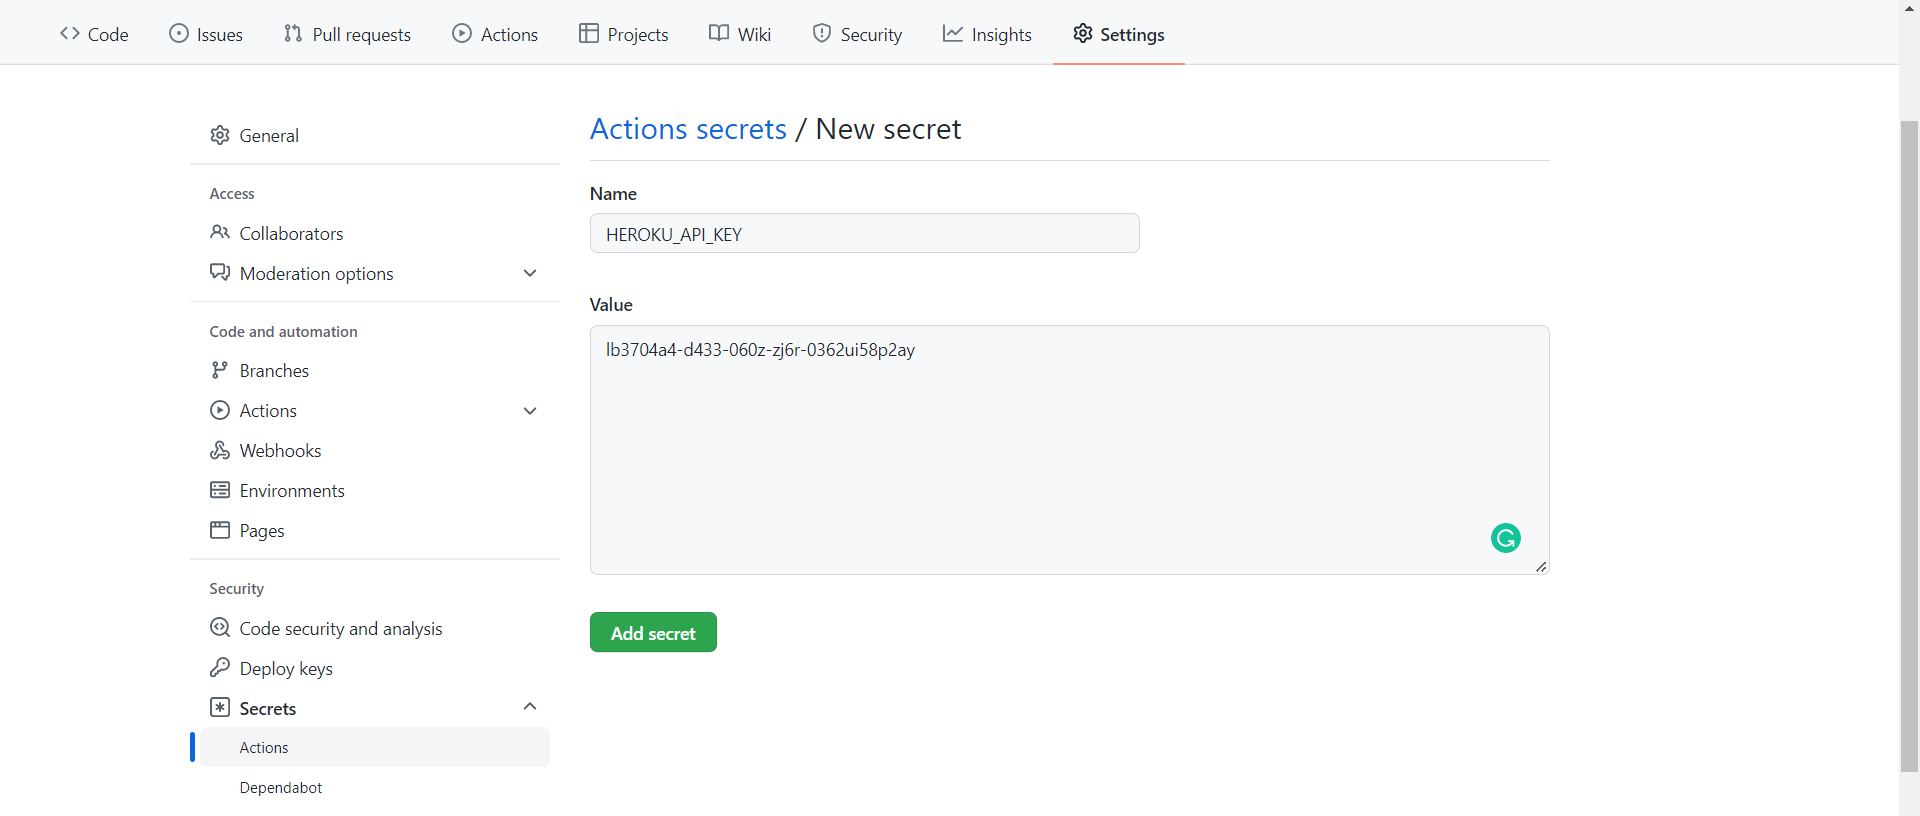
actions/checkoutand then we use another actionheroku-deploycreated by akhileshns.This Action requires three values: heroku_api_key, heroku_app_name and heroku_email. We are passing the values from our repo's secrets (like we do with environment variables in our local repo).
Now, push your code to GitHub and after you see the yaml file on your GitHub repo, either push some changes again or you can run the workflow manually.
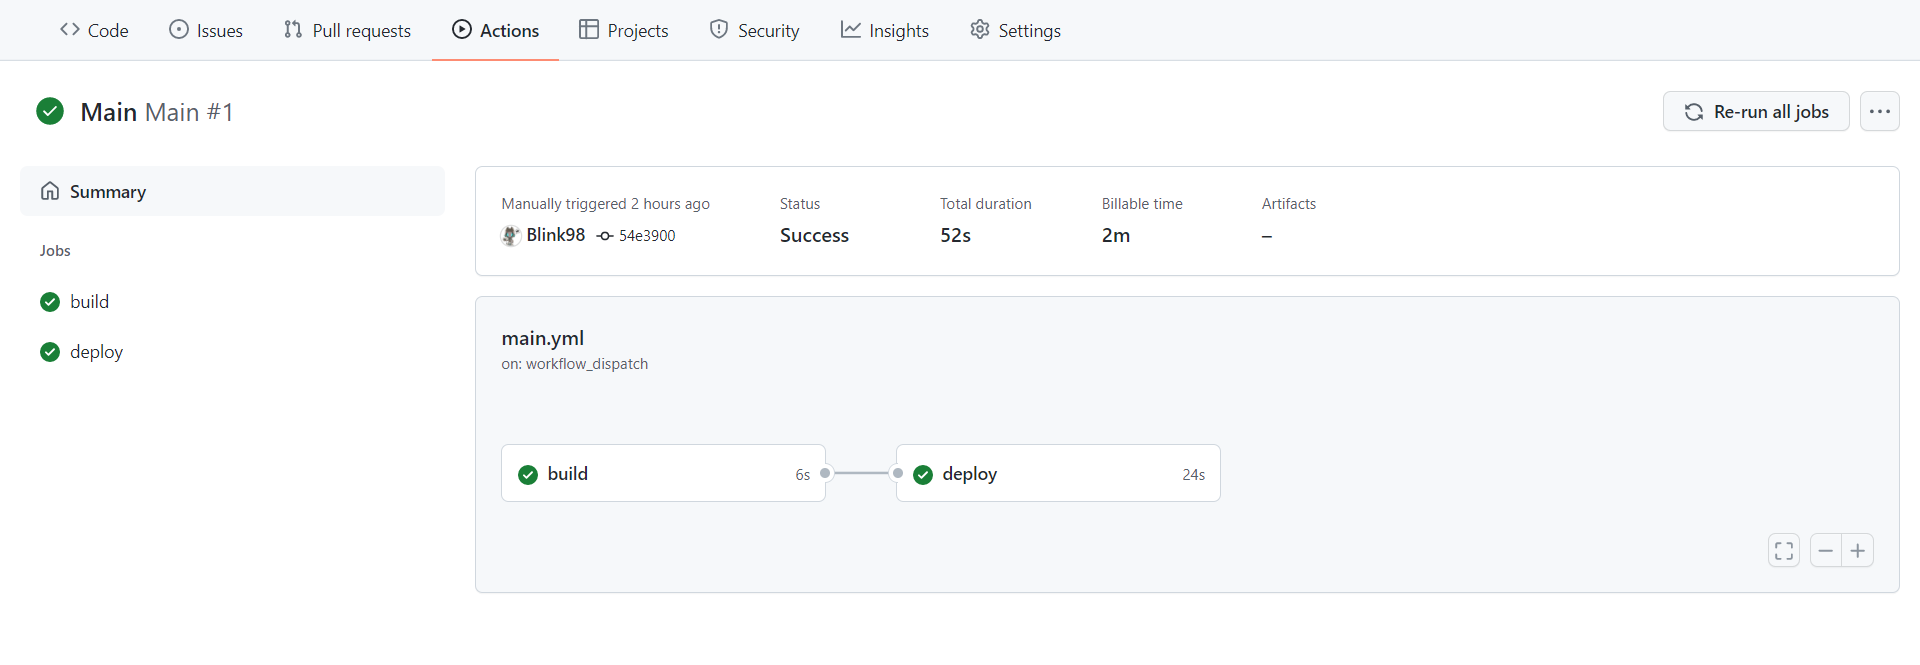
Congratulations, you can now check your live app hosted on Heroku.
Deploying to AWS
We will be using 2 services from AWS:
Elastic Beanstalk: To run our app
CodePipeline: For CI/CD
Elastic Beanstalk
Open Elastic Beanstalk service from navbar and click Create a new application.
Enter your Application name and click Create.
Click Create a new environment and select Web server environment.
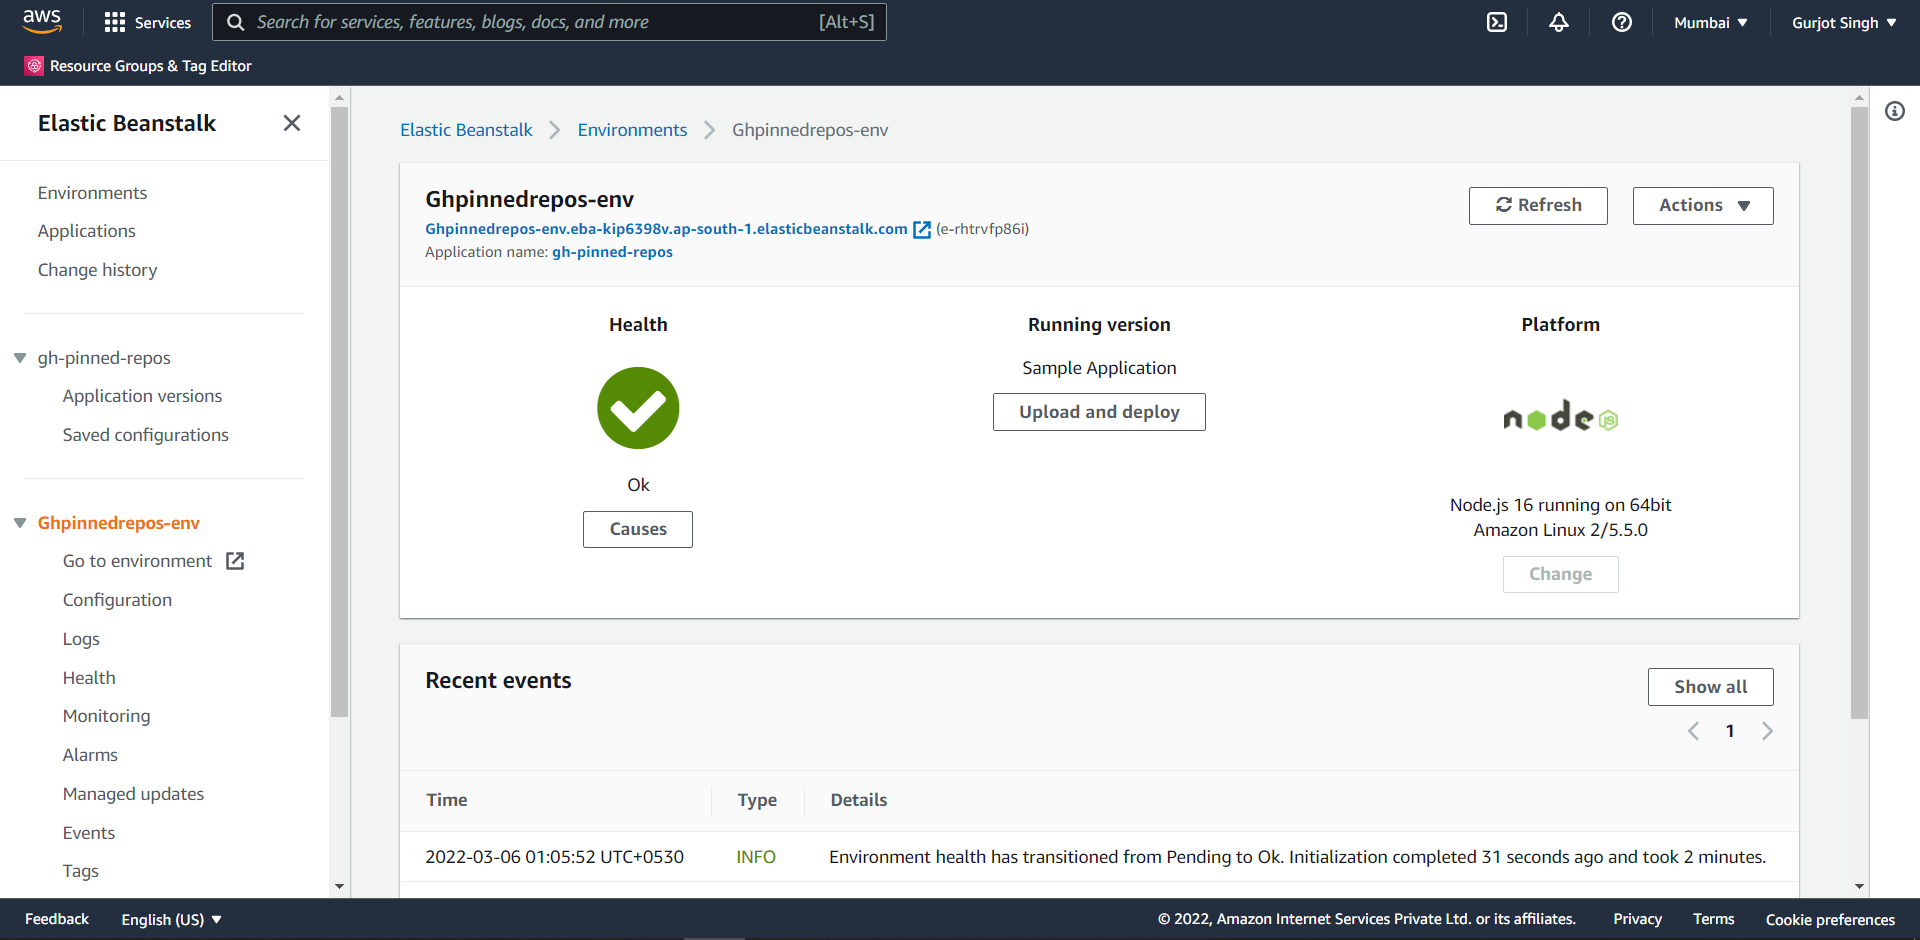
In the Platform section, choose Node.js as the Platform (leave everything else as it is) and hit Create Environment.
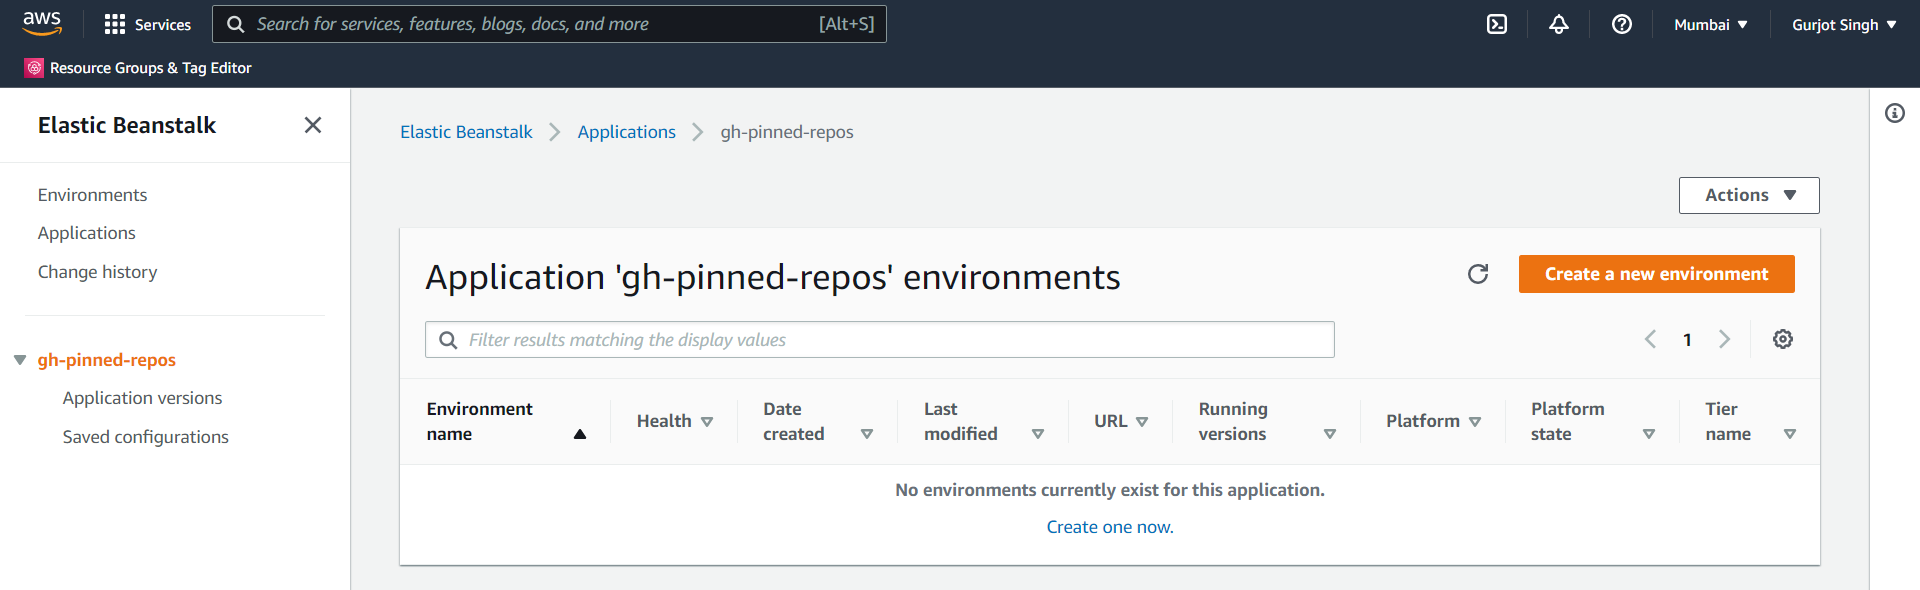
- Wait for a few minutes until it is successfully created.
Codepipeline
Now, we will connect our GitHub repo to our Elastic Beanstalk using the AWS Codepipeline service. It is similar to Heroku's in-built CI/CD.
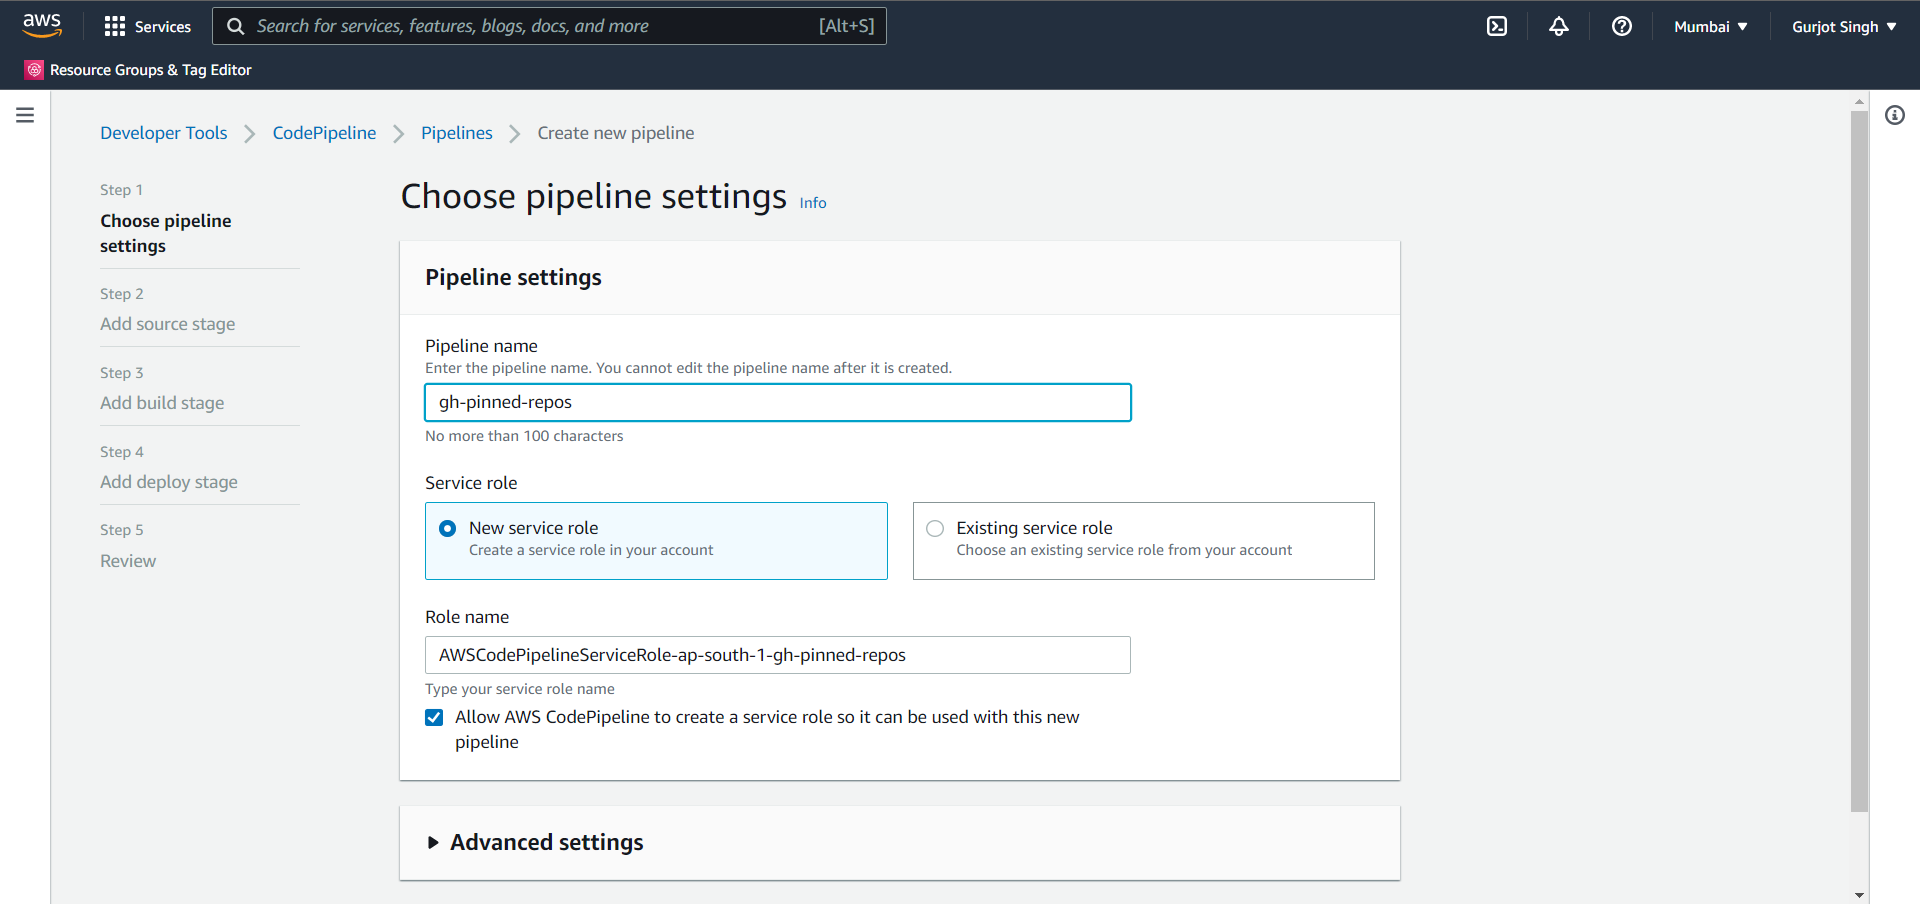
- Open Codepipeline and click Create pipeline.
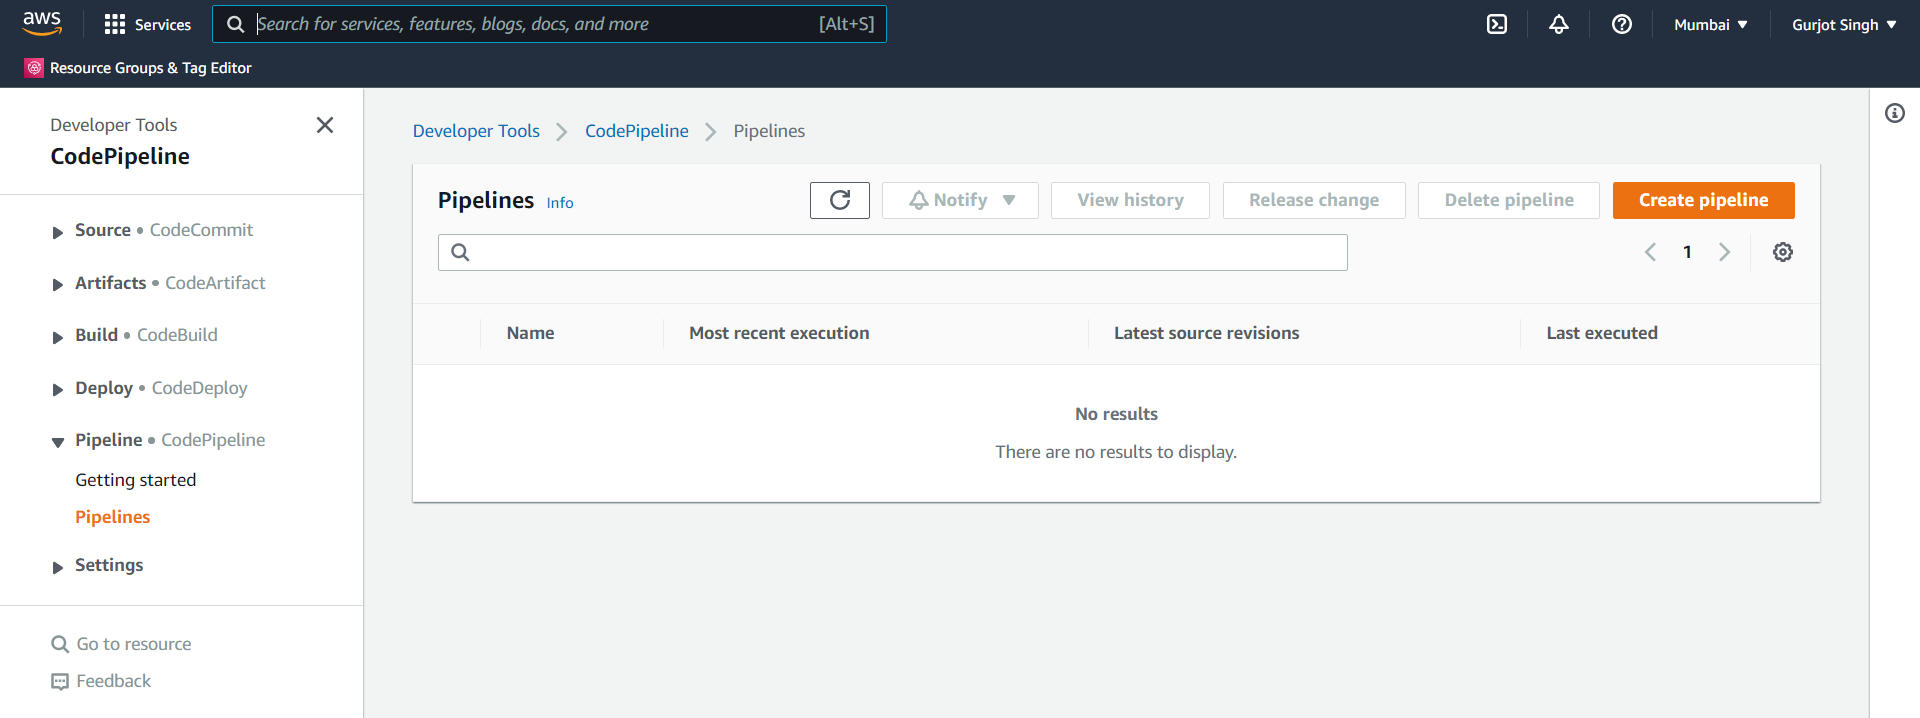
- Enter the name of your pipeline and hit Next.
Select GitHub (Version 1) as the Source provider and hit Connect to GitHub.
After you have connected to GitHub, select your Repository and master (or main) branch under Branch. Click Next.
Click Skip build stage.
In Add deploy stage, select AWS Elastic Beanstalk as your Deploy provider. Choose your recently created Elastic Beanstalk application and the environment under Application name and Environment name and click Next.
After reviewing click Create pipeline and wait for a few minutes until Deployment is successful.

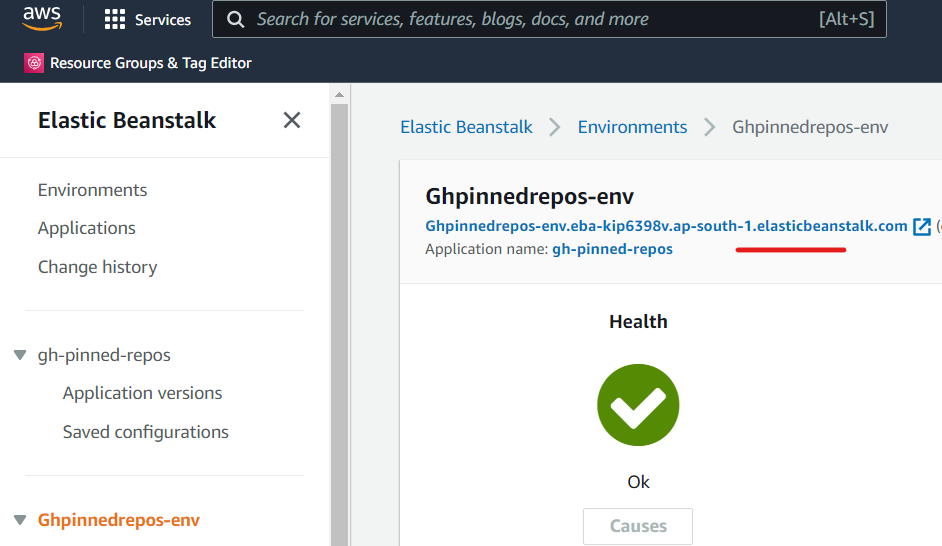
- You can now open your app using the link provided in your Elastic Beanstalk application environment.
Concluding
Congratulations on coming so far...🎉
That's all I had for this series. Stay tuned for upcoming articles.
If you have any doubts or issues, feel free to use the comment section and I will try my best to help you out.
Thank you for reading!!
Resources for better commits
You don't have to use all of them strictly, just try them out and see what feels more organised and clean. The whole point of writing a commit message is to briefly describe the changes to the reader in a meaningful manner.
Not about commits but still insightful: